-
Want to know how a system can be implemented or improved? Creating a process diagram is a great way to find out. It’s a kind of flowchart that helps visualise a process and document how a particular task is done. Get started by assembling a small team, finding some wall space, and gathering writing materials — writing out your diagram by hand makes it more flexible.
-
Bring your priority into focus
Ask your team: What is the focus of the flow diagram? Are you mapping a distribution channel? An approval process? Whatever it is, write this focus at the top of your dry erase surface. Next, have each person spend a few moments jotting down the key process steps needed to reach the focus goal on Post-it® Super Sticky Notes 76 mm. x 76 mm. and sticking them all in a column to the side of the dry erase surface.

-
Now is when the process mapping starts to take shape! Start your diagram by drawing an elongated circle on a Post-it® Super Sticky Note, label it 'Start,' and stick it on the dry erase surface.
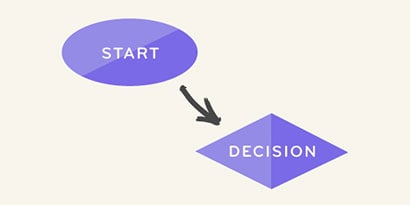
Move to the first action/question and use the rectangle or diamond shape, depending on your specific scenario. Write the action/question down and connect it with an arrow to the 'Start' circle.
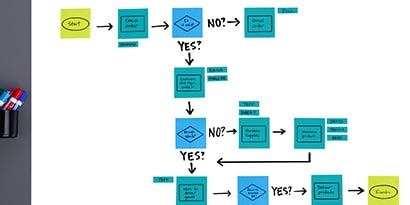
Continue these steps for your entire process. Throughout, you’ll use Post-it® Super Sticky Notes for the key points, actions, and questions, and draw your interconnected arrows on the dry erase surface. The notes are easy to remove and re-stick on anything as you go, refining the diagram and easily adjusting it as different methods and improved flows take shape. To assign ownership of each action, stick Post-it® Page Markers under them, and colour-code them to each team member to allow important actions to be easily identified. The page markers are great for highlighting tasks, and can be removed and re-stuck inside a planner or calendar with ease.
-
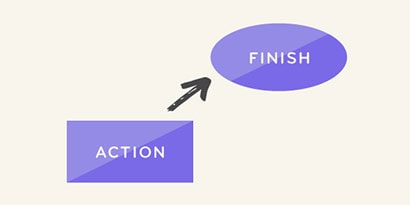
Some decisions may have two (or more) different outcomes, leading to different path channels — map them all! Connect all the actions and decisions with arrows, and watch the flow come into focus. Once you’ve mapped the entire process, place an elongated circle at the end and label it 'Finish.'
Have your team scrutinise the diagram. Are there ways to improve your process? Should additional steps be added? Are the right people in the right roles? With Post-it® Products, the simple process flow diagram puts thoughts into action, making it easy and quick for everyone on the team to stand out and be heard. You’ll gain new insights into the efficiency of your operations, solve problems and achieve more — together.
In certain cases, the best way to plan/optimise the steps in a process are to visualise them. The simple process flow diagram provides an easy-to-use method towards identifying the ins-and-outs of your system.
Want to know how a system can be implemented or improved? A simple process flow diagram is an effective way to map your process and document how a particular task is done. Get started by assembling a small team familiar with the process, find some wall space, gather some writing materials and use these rough guidelines:
-

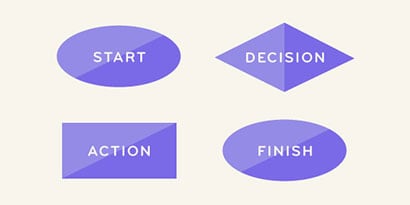
Create a key to help map your process:
a. Elongated circles typically symbolise the beginning and/or end of a process
b. Rectangles indicate instructions or actions.
c. Diamonds show decisions that must be madeThese symbols will be connected to each other by arrows, which show the flow of the process.

-

Start your diagram by drawing the elongated circle shape on a Post-it® Note and label it 'Start.'
-

Move to the first action/question and use the rectangle or diamond shape depending on your specific scenario. Write the action/question down and connect it with an arrow to the 'Start' shape. (Hint: use a Post-it® Full Adhesive Roll to create your arrow to allow for flexibility in case your diagram changes.)

-

Once you’ve mapped the entire process, place an elongated circle at the end and label it 'Finish.'

-

Have your team scrutinise the diagram. Are there ways to improve your process? Should additional steps be added? Are the right people in the right roles? From this point, you may gain new perspectives about the efficiency of your operation.
-
Products
-
Products


